Friday, 4 July 2014

Cheltenham Fawn comes to visit

Work has been on hold for a little while on the Puku, whilst I've had another Cheltenham caravan to play with. A friend of mine has a Cheltenham Fawn that required extensive repairs to its frame and chassis, due to water ingress and poor workmanship by so called professional restorer, who had originally been drafted in to fix the rot problems and just made them worse. After a couple of weeks, the little Fawn's frame was all done and the rotten rear cross member of the chassis had been cut out and a new one welded in. All the 12v electrics were overhauled and the interior reinstated with a fresh coat of varnish and new panelling where required. A nice little day trip out later, she was back with her owners, once again ready to go away on her holidays.
All finished 
j
Lots of rot and old bodge work
 
The dreaded tin worm had got to this bit

Friday, 4 April 2014

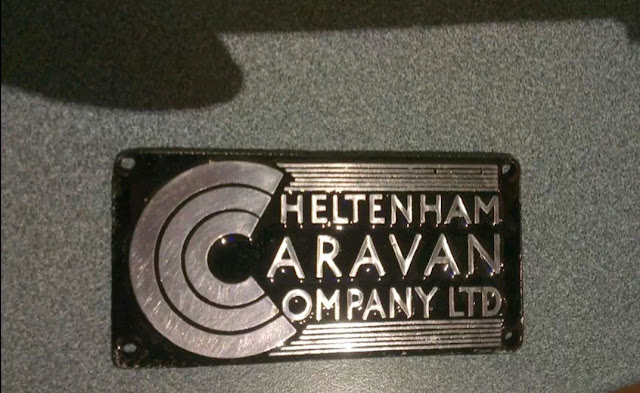
Cheltenham badge refurbishment

Another little job to do, is to refurbish the Cheltenham badge.


Firstly give it a good scrub with a wire brush, to remove all the corrosion. Don't be tempted to use a wire brush attachment for a drill, as this can be too harsh and can easily damage the soft metal that the badge is made from.
The next step is to paint the whole thing black. 
Aerosols are the best to use for this. I used satin black, but you could use gloss or matt, as the it will get painted over later, so the finish doesn't matter.

Two coats later and it should look a little like this. 
Now the fun bit! Using a sand block and some 400 grit wet and dry, sand the face of the badge, to cut the paint back over the raised lettering. You need to make sure, to keep the sanding block flat to the badge and the paper tight to the block, otherwise you'll round the edges of lettering off. Keep carefully sanding until the letters are nice and shiney with no signs of corrosion.
Next, give it a quick wash to clean all the dust away, and dry off. Once dry, give it several coats of automotive clear lacquer. I sprayed five coats, to get a deep shine. 
And there you go as good as new. 

If you want a deeper lustre, just keep applying coats of clear lacquer. 

Here's one I did with 20 coats

Sunday, 2 March 2014

New cupboards take shape

Plans to bring the puku home this week failed, due to the car deciding to act up. So I decided to start getting the rotten  cupboards rebuilt.

After dismantling the rear over sink cupboard, all that was left, in a usable state was the frame that the sliding doors mount in. Even the sliding doors themselves were of no use, as they been so vigorously sanded in the past, they'd sanded through the top layer of the ply. The rest was just completely rotten. 

The frame was sanded down and given 4 coats of varnish.
I dismantled the cupboard as carefully as I could, to ensure that I would still be able to use the remains as templates. This way I quickly had the side panels and the top cut from 9mm plywood and the bottom from 6mm plywood. A bit of glue down each rebate and a few panel pins, hold the whole lot in place.
Whilst I was waiting for the glue to dry, I made a start on the very delicate front pelmet. I'd already manage to remove the ply front and shelf front but dismantling the rest of the structure looked like it wasn't going to end well. I decided to mark out the top and bottom panels, directly on to the new timber, before attempting to dismantle it any further. I then cut the new panels, again from 9mm plywood, and checked them against the originals. This proved to be a good plan, as the second I started to prise the panels apart, they literally disintegrated!
With such a complicated piece, it's always advisable to take as many photos as possible. These as invaluable references when reconstructing. 

I measured out where all the the uprights were to go on both pieces, then drilled and screwed them together. 
The next step, was the end panels. The originals were starting to delaminate but after a bit of thought, I decided to repair them, rather than replace, so they would match the rest of the unit. 
They were given a good sanding and then plenty of glue squeezed between each lamination, before clamping them up and leaving them to set over night.

The following day, the end panels were fixed in place. This gave me the positions to fit the battoning for the front panels and shortly after the front panels themselves we fixed in place with pva and panel pins. A hockey stick moulding covers up the join in the top shelf. 

An oval piece was cut from 9mm ply and stained to match, then fixed to the middle of the top shelf. This will be where the gas light will fit. The whole unit was then given 3 coats of satin varnish.

The last job was top fit the white hardboard backing panels. These are just glued in place. 

Back with the over sink cupboard, the next job was to remake the doors. Having selected a piece of 4mm ply with a nice grain, the doors were cut, using the old doors as a guide. The handles and catches were then transferred from the old doors. The edges of the doors have to be thinned down to 2mm, to fit into the runners. They can then be squeeze into the runners before fixing the center brace back on to hold them in. The last job for this cupboard was again the white hardboard backing panel, which is just tacked in place.

Wednesday, 12 February 2014

My loft is turning into the caravan

With the British weather doing it's usual and training constantly, I've moved more than half the interior in to my loft so I can continue work.

The cupboards are coming along nicely. The table, seat bases, chest of drawers and all of the kitchen drawer fronts, have now been sanded back and refinished with 4 coats of satin clear varnish. 

Various parts after the second coat.
Before and after. 
Wall cupboard finished
Seat base finished.

All the parts have come out better than I'd hoped. The drawer front are solid oak and have suffered a bit of water damage and  become quite stained. Once vanished however, the grain came out and they look great.

With the drawer front looking good, I thought I'd make the inside look just as good. I decided to use an old road atlas to line them. I made each draw have it's own little theme

The Aberdeen drawer
The Yorkshire and Aberdeen drawers and memories and Joe's drawer bottoms.  
The bases after outlining the different maps.
I made sure to put Cheltenham on one of the bases, as well as Selkirk, where I got the puku from.

Wednesday, 29 January 2014

Wheels

It's been a busy couple of months for me at work, so I haven't had much chance to do any work on the puku. The weather, of course, not helping either.

I had to use the wheels from my sable, to bring the puku back from Scotland and it's been sitting on them ever since. So I thought it was about time i got it some boots of its own.

With the puku's wheels back home I gave them a good clean and inspection. One of them had quite a bit of surface rust but seemed ok. The other, initially seemed in better condition but then I noticed that at one point on the rim, on both sides, the metal had become very thin presumably from sitting in mud, with a flat tyre. So unfortunately I think this wheel will be for the scrappers. 

I took the other wheel to a local garage to have the old tyre removed.


Back home I started cleaning the rust from the rim with some 80 grit sand paper. After many hours of sanding, most of the worst rust was gone. A quick going over with 250 grit wet and dry and it was ready to paint.
For ease, I used white Hammerite spray paint, as it can be applied directly to barely metal and goes on reasonably thick to help hide some of the pitting. It is also reasonably resistant to stone chipping. I had intended to use the smooth finish but picked up the hammered finish by mistake. As it turned out, the hammered finish worked quite well to hide some of the pitting. I then went over the front face with a few coats of the smooth finished paint. 
 I'm very pleased with the finish. Now just to get a tyre fitted and find another wheel!

Sunday, 8 December 2013

A productive day

A reasonably productive day today. Headed up to the puku and started to dismantle the interior further. I still needed to find where a couple of leaks were coming from and need to strip back all the rotten wall cladding to inspect the frame. I started by removing the seats. These are only held in be a couple of screw, but as with everything else, these would not budge. I've always found a sash knife to be my best friend when it comes to carefully removing panels. A couple of quick taps with the sash knife and the seats were out. I then turned my attention to the walls(or what's left of them). Again using the sash knife I carefully removed the wall cladding. I intend to use the delicate remains as a template, to save time when making the new panels.
Once removed I could then see the frame. What a delightful surprise! There was next to no rot! A couple of bits to repair but nothing major.

I then started to remove the ceiling panels, again being carefully not to damage them too much, as I will use them as templates. I got a not so nice surprise, as I removed one of the boards, as hiding in the roof was a huge wasps nest! Although dormant is still startled me quite a bit.
I always find it nice to see notes and markings left by the people who built the caravan. There's quite a few in this van, just going to show how much of it was original. One of them scratched onto the back of an aluminum panel looks like a four spoked steering wheel, whilst most of the others are just references or a craftsman initials.

With all the interior panels removed I have found the source of two of the leaks. Both of them are damaged areas of the fibreglass front panel. You can see one of the damaged areas in the photo below. It is right below the gutter spout. There is also I thin wooden strip between where the end panel and the roof join, that is quite rotten.  Interestingly later Cheltenhams duo not have this wooden strip and the two panels are joined directly to each other. I may look at altering this to the latter style to prevent the wood rotting again. 

The final job for the day, was to fit one of the new windows I made last week. I haven't sealed them as I will be taking them back out when it comes to painting.
Back home, I decided it as time to take the plunge and see how much of the front pelmet/cupboard, was actually reusable. As I feared, it's pretty much all had it's day. The first clue, would have been it shedding bits of itself whenever I went near it. The only parts that are salvagable, are the battens that hold it together and maybe the end pieces. The end pieces are starting to delaminate but maybe be salvageable yet, with enough time and patience. I manage to persuade most of it to come apart with it losing its shape, or completely destroying any of it, so remaking a replacement should be a dodle. 
I will also be making up paper templates for it, as I've been asked for help by another Cheltenham owner. 

Friday, 6 December 2013

Rebuilding cupboards

The high level cupboards, both front and rear, are in a very poor state. At first glance, I thought the rear one would only need a couple of new bits and a good sanding back for the rest. On closer inspection, it turned out that pretty much all the plywood parts, were delaminating, apart from the sliding doors, which have been so vigorously sanded in the past, there's next to nothing left of the oak veneer. The only part still usable is the frame the the doors go in. 


The front cupboard/pelmet, literally fell apart as I took it down. For the amount of work it would take to salvage the very few useful bits from it, it's probably, going to be easier to start again.
Although I'm trying to retain the originality of the caravan, I do find this presents an opportunity to design in something more personal. Maybe putting frosted perspex sliding doors, instead of wooden ones. Putting in lighting in to the units etc. I'm going to get the basic cupboards done and then have a little play.

As the wood is very delicate, I have had to very carefully dismantle the cupboard, to keep the pieces together as much as possible, so I can use them as a template to cut new pieces. It will require both ends, top and bottom cutting from 6mm plywood and the back cutting from white faced hardboard. 

The frame sanded back really well to reveal beautifully grained oak, as with some of the other units.